Julia Set Visualization
Introduction
The Julia Set Visualizer is a project aimed at bringing to life the intricate and captivating beauty of Julia sets, which are fundamental objects in the field of complex dynamics and fractal geometry. Julia sets are named after the French mathematician Gaston Julia, who, in the early 20th century, made significant contributions to our understanding of these complex structures. The study of Julia sets not only serves as a gateway into the fascinating world of fractals but also provides deep insights into the behavior of complex systems.
Background and Mathematical Foundation
Julia sets are derived from the dynamics of iterating a complex function, typically a quadratic polynomial of the form:
\[f_c(z) = z^2 + c\]where \(z\) is a complex number and \(c\) is a complex parameter. For a given value of \(c\), the Julia set is the boundary that separates points in the complex plane that converge to a stable cycle from those that escape to infinity under repeated iteration of the function \(f_c(z)\).
Mathematically, the Julia set can be described as the closure of the set of repelling periodic points of the function. However, a more intuitive approach is to consider the behavior of individual points in the complex plane under iteration. For a fixed \(c\), starting with a point \(z_0\), we generate a sequence \(z_1 = f_c(z_0)\), \(z_2 = f_c(z_1)\), and so on. Depending on the value of \(c\), the point may either remain bounded, forming part of the Julia set, or escape to infinity, indicating that it lies outside the Julia set.
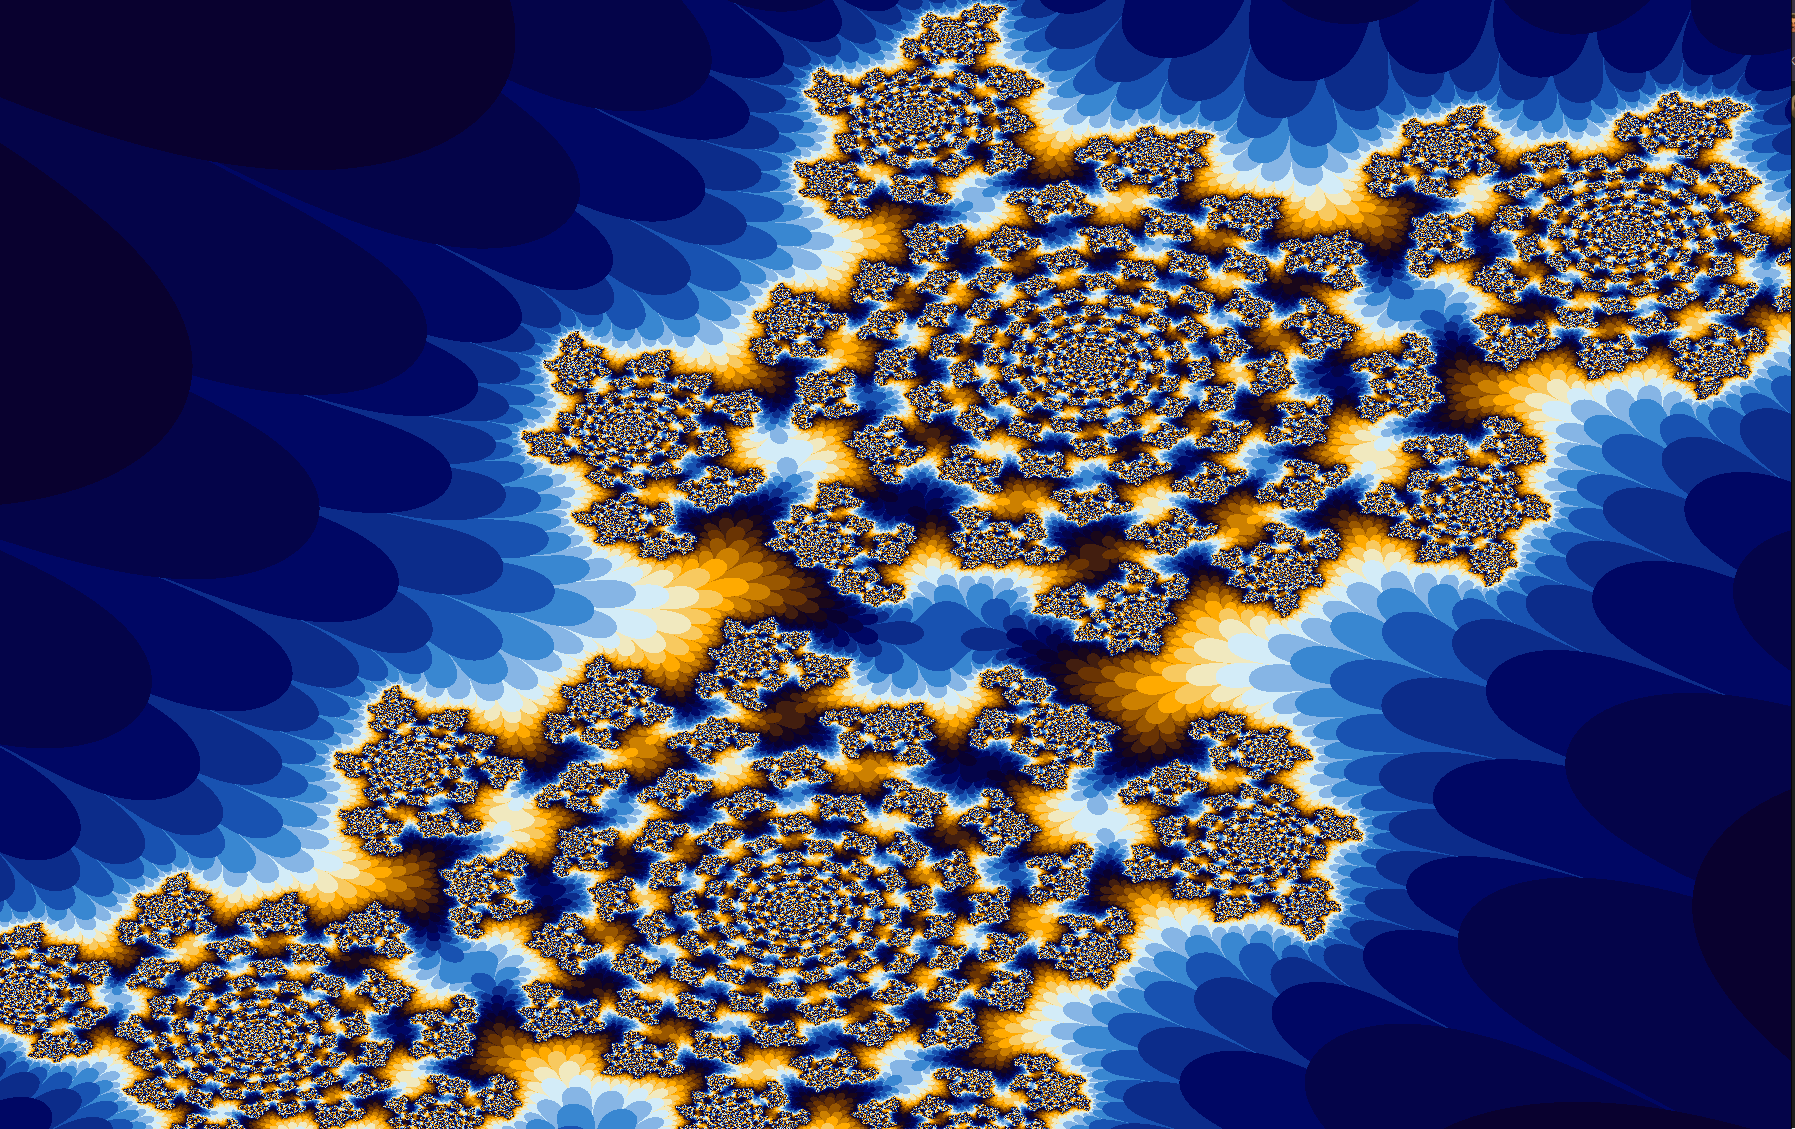
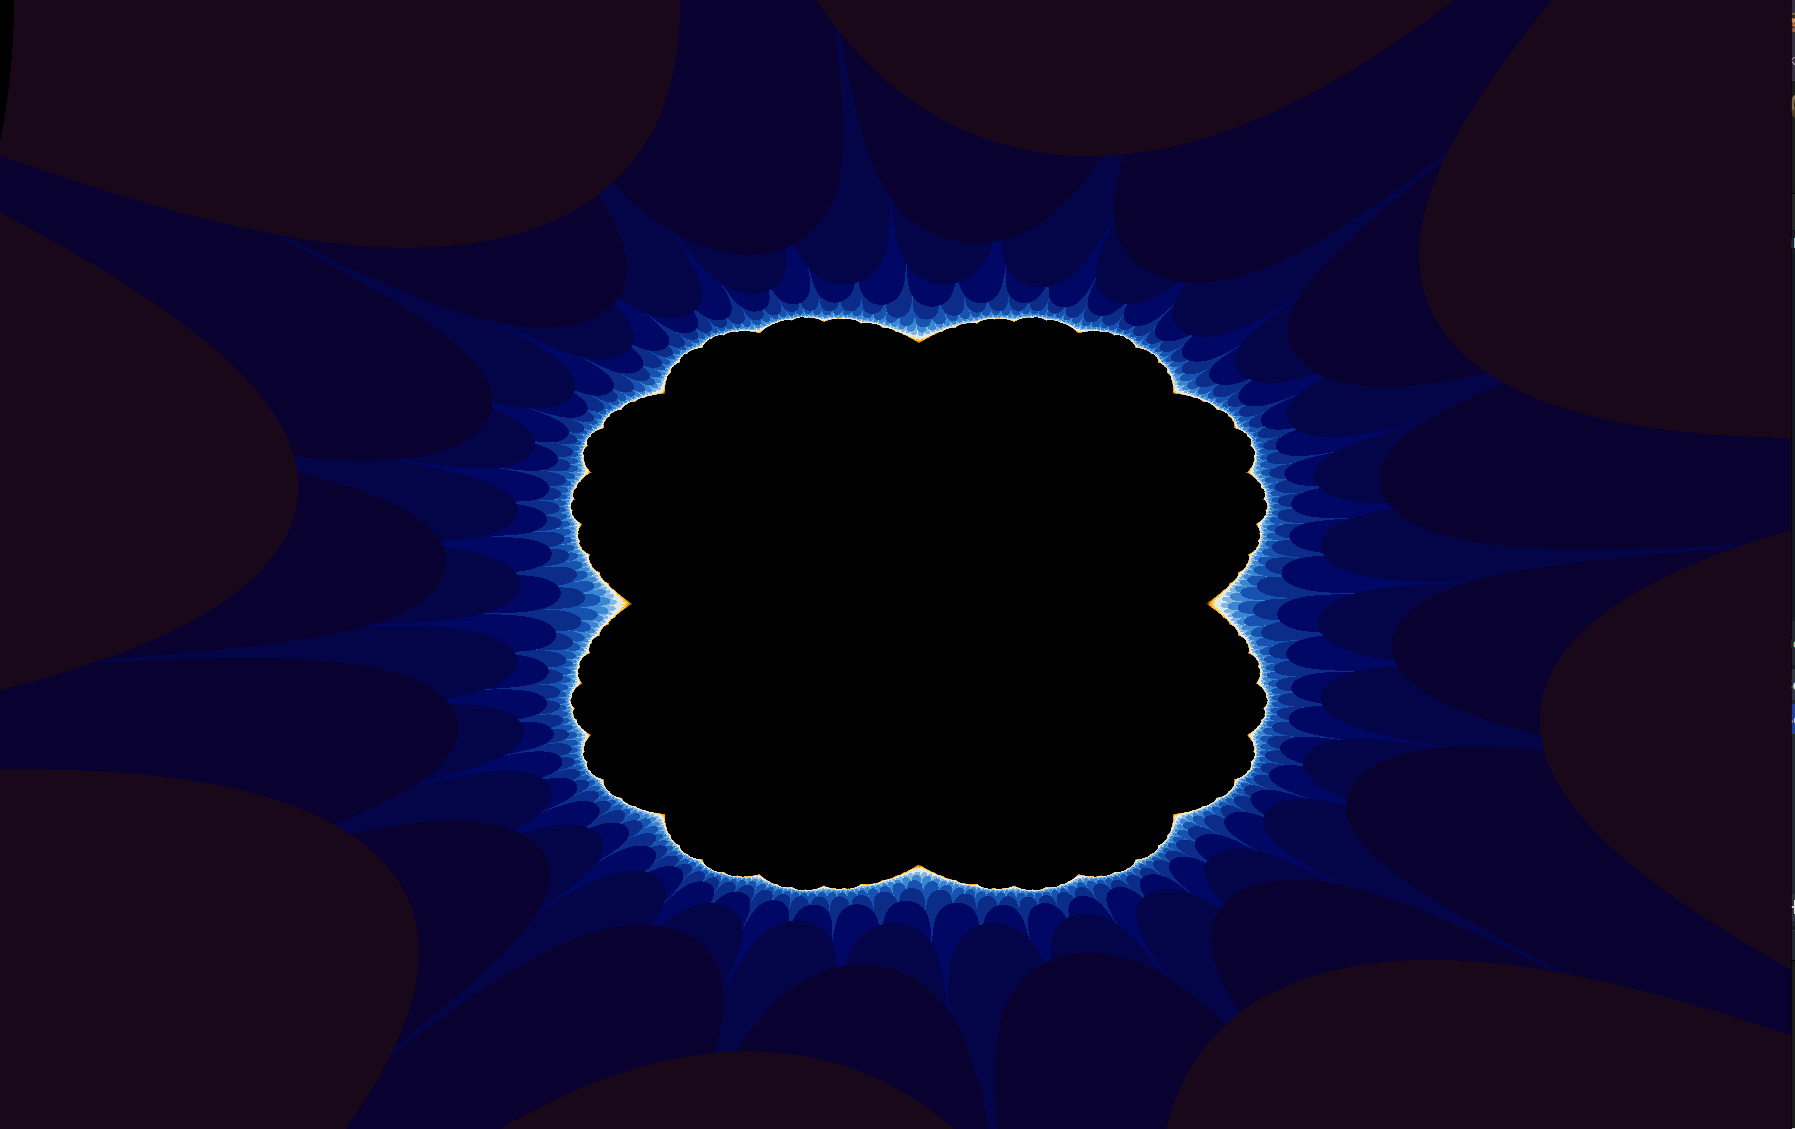
The visual representation of a Julia set reveals its intricate, self-similar structure—a hallmark of fractals. The appearance of the Julia set varies dramatically depending on the choice of the parameter \(c\). For some values of \(c\), the Julia set forms a connected structure, while for others, it breaks into a dust-like set of disconnected points, known as a “Cantor set.”
Purpose of the Project
The Julia Set Visualizer project is designed to allow users to explore the fascinating and diverse world of Julia sets by varying the complex parameter \(c\) and visualizing the resulting fractal patterns. Through this tool, users can gain a deeper understanding of the complex dynamics that govern these sets, as well as an appreciation for the stunning mathematical beauty that lies within them. Whether used for educational purposes, research, or simply to marvel at the aesthetics of fractals, the Julia Set Visualizer opens a window into a world where mathematics and art converge.
Base Algorithm
The core of the Julia Set Visualizer lies in its ability to compute and color each point in a two-dimensional grid representing the complex plane. The algorithm determines whether each point belongs to the Julia set for a given complex parameter c by iterating the function \(f(z)=z^2+c\). The coloring of each point is based on the number of iterations it takes for the sequence to escape a predefined threshold. Below is a detailed explanation of the base algorithm, as illustrated by the provided C code.
Color Representation and Utilities
The visualization requires coloring each point to represent its behavior under iteration. Colors are handled using 32-bit integers.
uint32_t get_int_from_color(int red, int green, int blue) {
    red = (red << 16) & 0x00FF0000;
    green = (green << 8) & 0x0000FF00;
    blue = blue & 0x000000FF;

    return 0x00000000 | red | green | blue;
}
Initializing the Color Map
A predefined color map enhances the visual appeal by assigning specific colors to different iteration counts.
void initialize_color_map() {
    color_map[0] = get_int_from_color(66, 30, 15);
    color_map[1] = get_int_from_color(25, 7, 26);
    // ... additional colors ...
    color_map[15] = get_int_from_color(106, 52, 3);

    black = get_int_from_color(0, 0, 0);
}
Mapping Iteration Counts to Colors
Each point’s iteration count determines its color. Points that escape quickly are colored differently from those that remain bounded longer.
uint32_t get_color(int n) {
    if (n < MAX_ITERATIONS && n > 0) {
        int i = n % 16;
        return color_map[i];
    }
    return black;
}
Iterating the Complex Function
The heart of the algorithm computes how each point behaves under iteration of the function \(f(z) = z^2 + c\). This function takes in a coordinate on the complex plane defined by (a,b) and the complex constant c and performs the iteration up to MAX_ITERATIONS. If the absolute value of \(f(z)\) is less than some pre-defined threshold, the iteration stops. The number of iterations will determine the color using the get_color function shown above.
int color_point(double a, double b, ComplexNumber* c) {
    int n = 0;
    while (n < MAX_ITERATIONS) {
        double u = (a * a - b * b) + c->x;
        double v = (2 * a * b) + c->y;

        if (fabs(u + v) > THRESHOLD) {
            break;
        }

        a = u + a;
        b = v + b;

        n++;
    }
    return n;
}

CPU Parallelization
Unfortanately, this process is quite slow. This process has to occur for each pixel on the screen, meaning that with screen dimensions at 1800x1200, there is a total of 2,160,000 pixels. Therefore, to increase the speed of processing, parallelization may help. My first attempt to do so involved utilizing pthreads, POSIX threads that have an easy interface in C. To parallelize the computation, I would take the numnber of threads and split screen, which is a rectangle, into smaller rectangles. For example, four threads would split the screen at half of the width and half of the height, creating four boxes. At nine threads, there would be nine even boxes that make up the entire screen space.

Definitions and bounds for the chunks(boxes):
typedef struct {
    uint32_t** image_pixels;
    int x_chunk;
    int y_chunk;
    ComplexScene* scene;
} ChunkData;

void get_chunk_bounds(int screen_width, int screen_height, int num_chunks, int chunk_row, int chunk_col, int *x_min, int *y_min, int *x_max, int *y_max) {
    // Calculate the width and height of each chunk
    int chunk_width = screen_width / num_chunks;
    int chunk_height = screen_height / num_chunks;

    // Calculate the bounds of the specified chunk
    *x_min = chunk_col * chunk_width;
    *x_max = *x_min + chunk_width;
    *y_min = chunk_row * chunk_height;
    *y_max = *y_min + chunk_height;
}
Calculating each pixel in a chunk:
void* calculate_chunk(void* d) {
   ChunkData* data = (ChunkData*) d;
   int x_min, x_max, y_min, y_max;
   get_chunk_bounds(WIDTH, HEIGHT, num_chunks, data->x_chunk, data->y_chunk, &x_min, &y_min, &x_max, &y_max);
   for (int x = x_min; x < x_max; x++) {
       for (int y = y_min; y < y_max; y++) {
           add_pixel(x, y, data->scene->bounds, data->scene->c, data->image_pixels);
       }
   }

   return NULL;
}

void run_chunk(pthread_t* tid, uint32_t** ip, int x_chunk, int y_chunk, ComplexScene* scene) {
    ChunkData* data = (ChunkData*) calloc(1, sizeof(ChunkData));
    data->image_pixels = ip;
    data->x_chunk = x_chunk;
    data->y_chunk = y_chunk;
    data->scene = scene;

    pthread_create(tid, NULL, calculate_chunk, data);
}
Processing the whole set:
void calculate_pixels(ComplexScene* scene, uint32_t*** ip) {
    uint32_t ** image_pixels = *(ip);
    pthread_t tid[num_chunks * num_chunks];
    int k = 0;
    for (int x_chunk = 0; x_chunk < num_chunks; x_chunk++) {
        for (int y_chunk = 0; y_chunk < num_chunks; y_chunk++) {
            run_chunk(&tid[k], image_pixels, x_chunk, y_chunk, scene);
            k++;
        }
    }

    for (int k = 0; k < num_chunks*num_chunks; k++) {
        pthread_join(tid[k], NULL);
    }
    return;
}
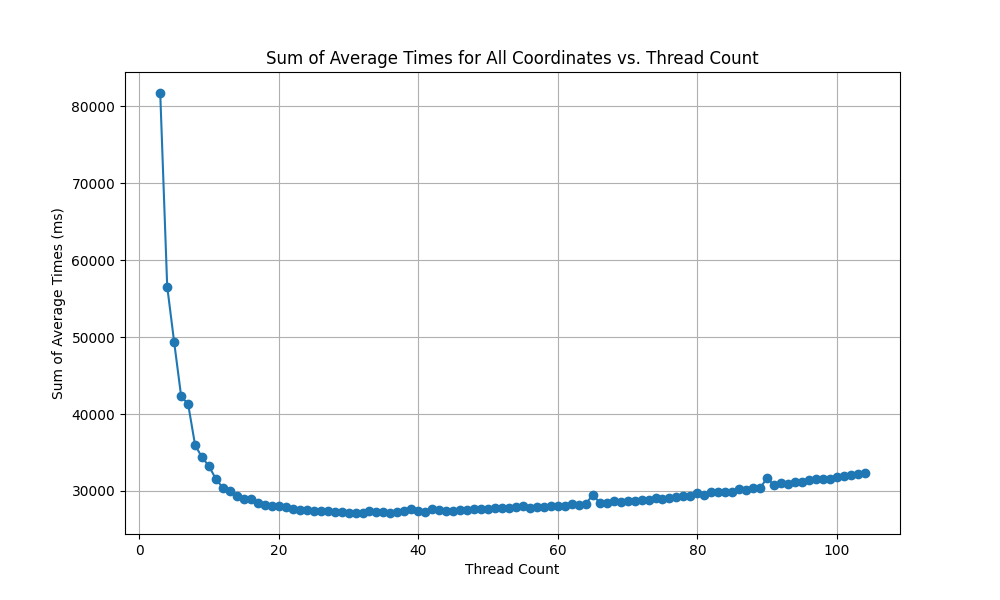
While this initially increased the time of processing, there were quickly diminishing and then negative returns. This is because as the number of threads increases, the overhead of a context switch begins to increase in proportion to the amount of computation being performed by the thread. This is worsened because each thread does less computation as the number of threads increases. Here is a graph of the time to compute a julia set by number of threads:

As such, while CPU parallelization has some benefit, it doesn’t solve the problem. It can be done better.
GPU Parallelization
GPUs are Graphics Processing Units that can help perform mathematical process at increased speed using parallelization. A GPU can perform many math operations at the same time and faster than a CPU. Whereas a CPU might have 8 cores, modern (consumer) GPUs like NVIDIA’s RTX 4090 have 16,384 CUDA cores. To do so, we have to write GPU code. Since I have access to a NVIDIA GPU, I will be writing CUDA code which is a specific lanaguage used to interface with NVIDIA GPUs.
The function add_pixel_kernel would calculate and add the pixel to the image array. This is doing most of the heavy lifting, although some helpers functions were translated to CUDA to work as well.
__device__ double screen_map(double input_num, double min_input, double max_input, double min_output, double max_output) {
    return (input_num - min_input) * (max_output - min_output) / (max_input - min_input) + min_output;
}

__global__ void add_pixel_kernel(ComplexBounds* scene_bounds, ComplexNumber* c, uint32_t* image_pixels) {
    int x = blockIdx.x * blockDim.x + threadIdx.x;
    int y = blockIdx.y * blockDim.y + threadIdx.y;

    if (x < WIDTH && y < HEIGHT) {
        double a = screen_map(x, 0, WIDTH, scene_bounds->min_real, scene_bounds->max_real);
        double b = screen_map(y, 0, HEIGHT, scene_bounds->min_img, scene_bounds->max_img);

        int n = color_point(a, b, c);
        uint32_t color = get_color(n);
        image_pixels[y * WIDTH + x] = color;  // Note: linearized indexing for 2D array
    }
}
The blockIdx, blockDim, and threadIdx help CUDA identify what components of the pixel it is calculating. The regular processing is performed, with the exception that 2D arrays aren’t supported in CUDA so linearized indexing is required. This function is called using the add_pixel function:
void add_pixel(ComplexBounds* scene_bounds, ComplexNumber* c, uint32_t* image_pixels) {
    dim3 threadsPerBlock(THREADS_PER_BLOCK, THREADS_PER_BLOCK);
    dim3 numBlocks((WIDTH + THREADS_PER_BLOCK - 1) / THREADS_PER_BLOCK, (HEIGHT + THREADS_PER_BLOCK - 1) / THREADS_PER_BLOCK);

    add_pixel_kernel<<<numBlocks, threadsPerBlock>>>(scene_bounds, c, image_pixels);
    cudaDeviceSynchronize();
}
This calculates the number of blocks required with the given number of threads per block and runs the function add_pixel_kernel with those parameters so CUDA knows how to parallelize the work.
GPUs are crazy fast and allow for parallelization to drastically increase the processing speed enabling real-time applications.
SDL2
GPU parallelization enables quick processing of changes. Therefore, changes can be displayed quickly. Moving around the plane, zooming, changing the constant c, and animations can all be performed in a smooth experience. When waiting for a user event, a function called wait_event polls for the next user event. There are a few options.
int wait_event(ComplexScene *scene, int* change, int* quit) {
    SDL_Event event;
    ComplexNumber* c = scene->c;
    ComplexBounds* bounds = scene->bounds;
    int ret = 0;
    double move_amount = 0.005;

    while (SDL_PollEvent(&event)) {
        if (event.type == SDL_QUIT) {
            *quit = 1;
            break;
        }
        ...
    }
}
Arrow Key Press
If an arrow key is pressed, this is a change to the constant c. This isn’t too complicated:
if (event.key.keysym.sym == SDLK_LEFT) {
    c->x -= move_amount;
    *change = 1;
} else if (event.key.keysym.sym == SDLK_RIGHT) {
    c->x += move_amount;
    *change = 1;
} else if (event.key.keysym.sym == SDLK_UP) {
    c->y += move_amount;
    *change = 1;
} else if (event.key.keysym.sym == SDLK_DOWN) {
    c->y -= move_amount;
    *change = 1;
}
Zoom
Zooming is slightly more difficult. This is because instead of zooming into the center of the complex plane (0,0), we want to zoom into the center of the screen. This means finding the real and imaginary components of the screen, taking the middle, and adjusting the bounds.
void zoom(ComplexBounds* bounds, double scaling_factor) {
    double real_center = (bounds->max_real + bounds->min_real)/2;
    double img_center = (bounds->max_img + bounds->min_img)/2;
    bounds->max_real = real_center + scaling_factor * (bounds->max_real - real_center);
    bounds->min_real = real_center + scaling_factor * (bounds->min_real - real_center);
    bounds->max_img = img_center + scaling_factor * (bounds->max_img - img_center);
    bounds->min_img = img_center + scaling_factor * (bounds->min_img - img_center);
}
Move
The final action is move, which calculates the movement from a mouse click and drag action. To accomplish this, a down click event is registered and the mouse coordinates are recoreded. Then, once an up click event is registered, the mouse coordinates are recorded and a difference is calculated. The difference is calculated by subtracting the second positon from the first position. However, this alone would yield numbers in the hundreds as positions on the screen are based on pixel positions. To adjust for this, I normalized the result. However, this still isn’t enough has zooming in means the screen might show an area spanning the upper and lower bounds of 64-bit floating point precision. Thus, I added one more component to scale with the current area.
} else if (event.type == SDL_MOUSEBUTTONDOWN && event.button.button == SDL_BUTTON_LEFT) {
    int x1, y1, x2, y2;
    SDL_GetMouseState(&x1, &y1);

    SDL_Event mouse_up;
    while (SDL_WaitEvent(&mouse_up)) {
        if (mouse_up.type == SDL_MOUSEBUTTONUP && mouse_up.button.button == SDL_BUTTON_LEFT) {
            break;
        }
    }

    SDL_GetMouseState(&x2, &y2);

    double xdiff = ((double)(x1 - x2) / sqrt((double)(x1 * x1) + (double)(x2 * x2))) * (bounds->max_real - bounds->min_real);
    double ydiff = ((double)(y1 - y2) / sqrt((double)(y1 * y1) + (double)(y2 * y2))) * (bounds->max_img - bounds->min_img);

    bounds->max_real += xdiff;
    bounds->min_real += xdiff;
    bounds->max_img += ydiff;
    bounds->min_img += ydiff;
    *change = 1;
}
Conclusion
The Julia Set Visualizer project provides a dynamic way to explore the complex world of fractals and the mathematical beauty that emerges from iterative processes. By combining mathematical theory, computational techniques, and graphical rendering, this project demonstrates how complex dynamics can be visualized and manipulated in real-time. I also gained a deeper understanding of parallel processing, both on CPUs and GPUs, and the importance of efficient computation in graphical applications.
The repository with all of the code can be found below:
Enjoy Reading This Article?
Here are some more articles you might like to read next: